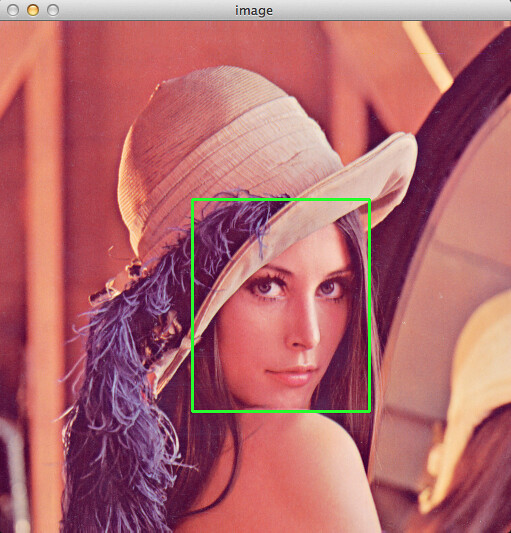
For image recognition or object tracking, we often need to define a target window to locate the area interested as below.
In this post, I would like to demonstrate how to use a mouse to define a rectangular window on the image with python 3 and OpenCV 3.
The following sample code named target_win.py, which is slightly modified from the code in a great post written by Adrian Rosebrock.
It shows an image for you to define a rectangular region as the target window with your mouse.
After hitting the key c to confirm your selection, it will write out the starting and ending points of the target window.
target_win.py:
import cv2
from skimage import data

def define_rect(image):
    """
    Define a rectangular window by click and drag your mouse.

    Parameters
    ----------
    image: Input image.
    """

    clone = image.copy()
    rect_pts = [] # Starting and ending points
    win_name = "image" # Window name

    def select_points(event, x, y, flags, param):

        nonlocal rect_pts
        if event == cv2.EVENT_LBUTTONDOWN:
            rect_pts = [(x, y)]

        if event == cv2.EVENT_LBUTTONUP:
            rect_pts.append((x, y))

            # draw a rectangle around the region of interest
            cv2.rectangle(clone, rect_pts[0], rect_pts[1], (0, 255, 0), 2)
            cv2.imshow(win_name, clone)

    cv2.namedWindow(win_name)
    cv2.setMouseCallback(win_name, select_points)

    while True:
        # display the image and wait for a keypress
        cv2.imshow(win_name, clone)
        key = cv2.waitKey(0) & 0xFF

        if key == ord("r"): # Hit 'r' to replot the image
            clone = image.copy()

        elif key == ord("c"): # Hit 'c' to confirm the selection
            break

    # close the open windows
    cv2.destroyWindow(win_name)

    return rect_pts


# Prepare an image for testing
lena = data.lena() # A image array with RGB color channels
lena = cv2.cvtColor(lena, cv2.COLOR_BGR2RGB) # Convert RGB to BGR

# Points of the target window
points = define_rect(lena)

print("--- target window ---")
print("Starting point is ", points[0])
print("Ending   point is ", points[1])
In case you haven't installed skimage which is a useful library for image processing in python, it can be installed by executing
pip3 install scikit-image
comments powered by Disqus